In this tutorial we’ll be going over DNS configuration for your ACI fabric.
Prerequisites:
* Fabric discovery completed
* In-Band/Out-of-Band connectivity for your APIC(s) and fabric switches to your DNS server
* Static node management addresses configured for your APICs and fabric switches under the default mgmt tenant
My other tutorial Configuring Out-of-Band Management Connectivity in ACI will assist with configuring the necessary Out-of-Band Management prerequisites (static node management addresses)
My Setup:
* ACI fabric running 3.2(6i)
The first step in setting up DNS in ACI is to create the necessary DNS Fabric Policies. To do so, navigate to the following APIC web GUI path:
Fabric -> Fabric Policies -> Policies -> Global -> DNS Profiles

Out of the box ACI will ship with a default DNS Profile where you can define the DNS servers you want to use:

You do not need to use this default policy and can create your own from scratch if you like.
Note: Creating and using a custom DNS Profile will not apply DNS Profile configuration to your APICs. If you want your APICs to have DNS configuration you must use the default DNS Profile
Considering the limitation mentioned above, for our purposes we’ll use the default DNS Profile. If for some reason you do not have the default DNS Profile, you can right click DNS Profiles in the policy folder structure and select Create DNS Profile with the name of default.
After selecting our default DNS Profile we can assign our preferred Management EPG and choose whether or not we want to add a DNS Domain. For our purposes we’ll skip adding a DNS Domain and just add our DNS Provider. You can add multiple DNS Providers and mark one of them as preferred. For our purposes we only have one DNS Provider, 64.102.6.247:
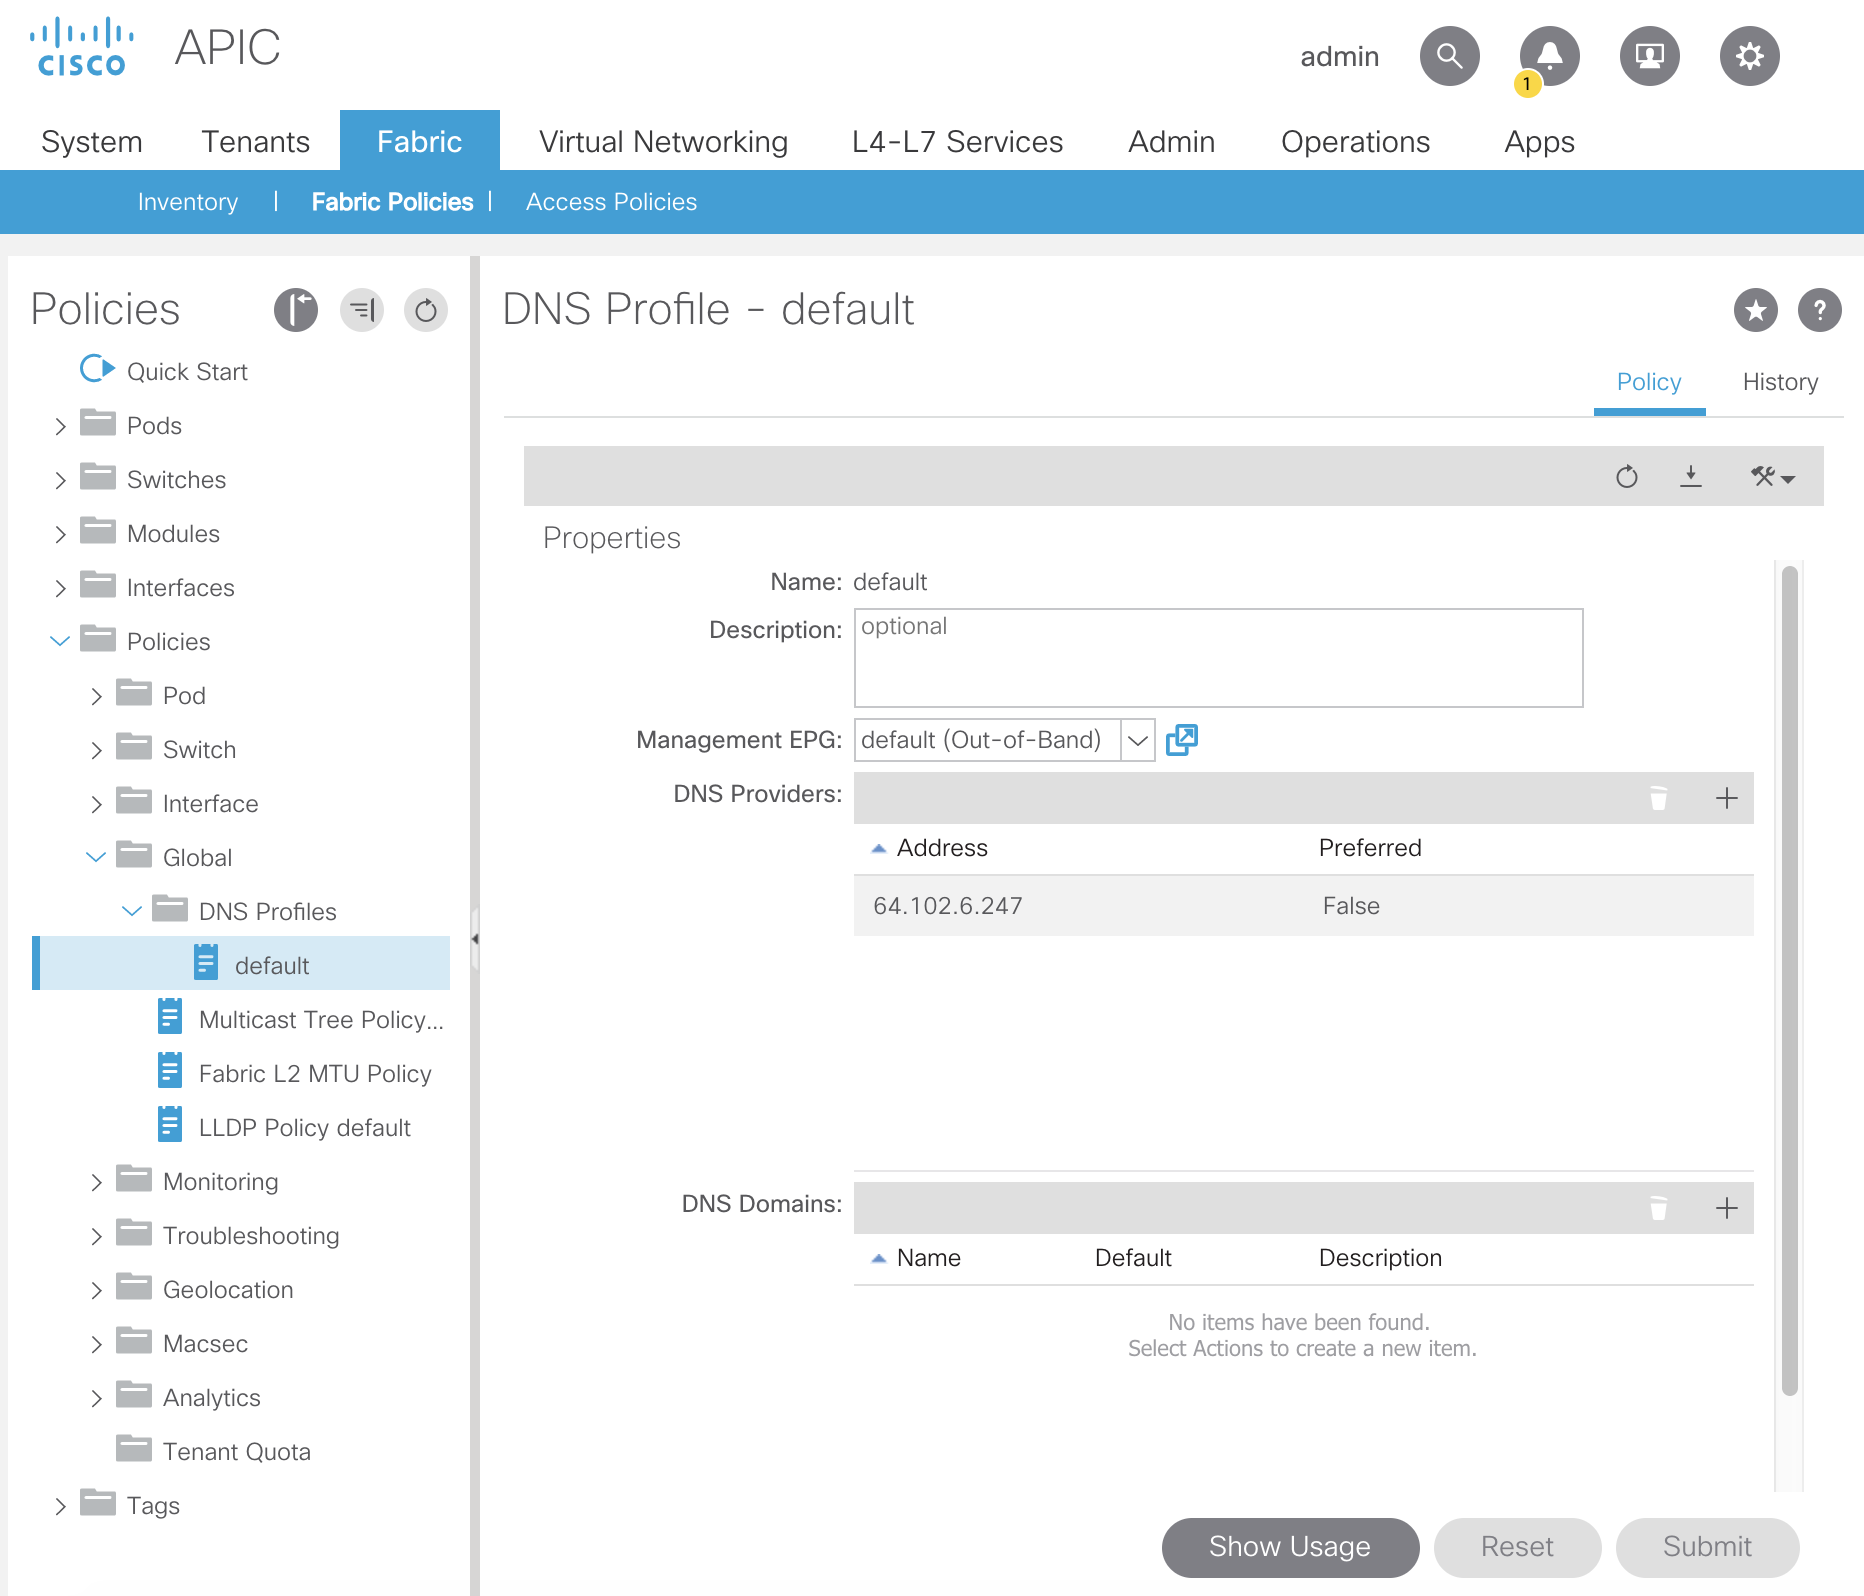
Click Submit to apply your changes
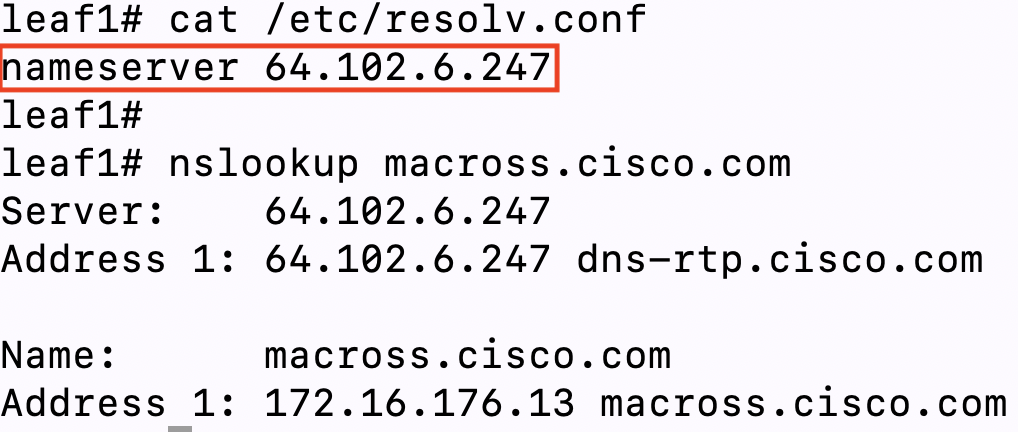
At this point in the configuration can you verify the DNS Provider(s) programmed on your APICs and fabric switches using the below command:
cat /etc/resolv.conf
On our APIC we can see the DNS Provider we defined in our default DNS Provider configuration:

Additionally we can verify that DNS resolution is working by performing an nslookup from our APIC:

However, running the cat /etc/resolv.conf command on one of our leaf switches results in no output:

This is due to missing configuration under the mgmt tenant. So let’s take a look at what we need to configure there now.
To get to the mgmt tenant navigate to the following APIC web GUI path:
Tenants -> ALL TENANTS -> mgmt

Once in the mgmt tenant navigate to your oob VRF by using the following APIC web GUI path:
Tenants -> mgmt -> Networking -> VRFs

Locate and left click your oob VRF. Once you’ve clicked the oob VRF select the Policy tab and scroll down until you see a field named DNS Labels:

In this DNS Labels text field we are going to put in the name of our DNS Profile, default. This will tie our default DNS Profile to the oob VRF:
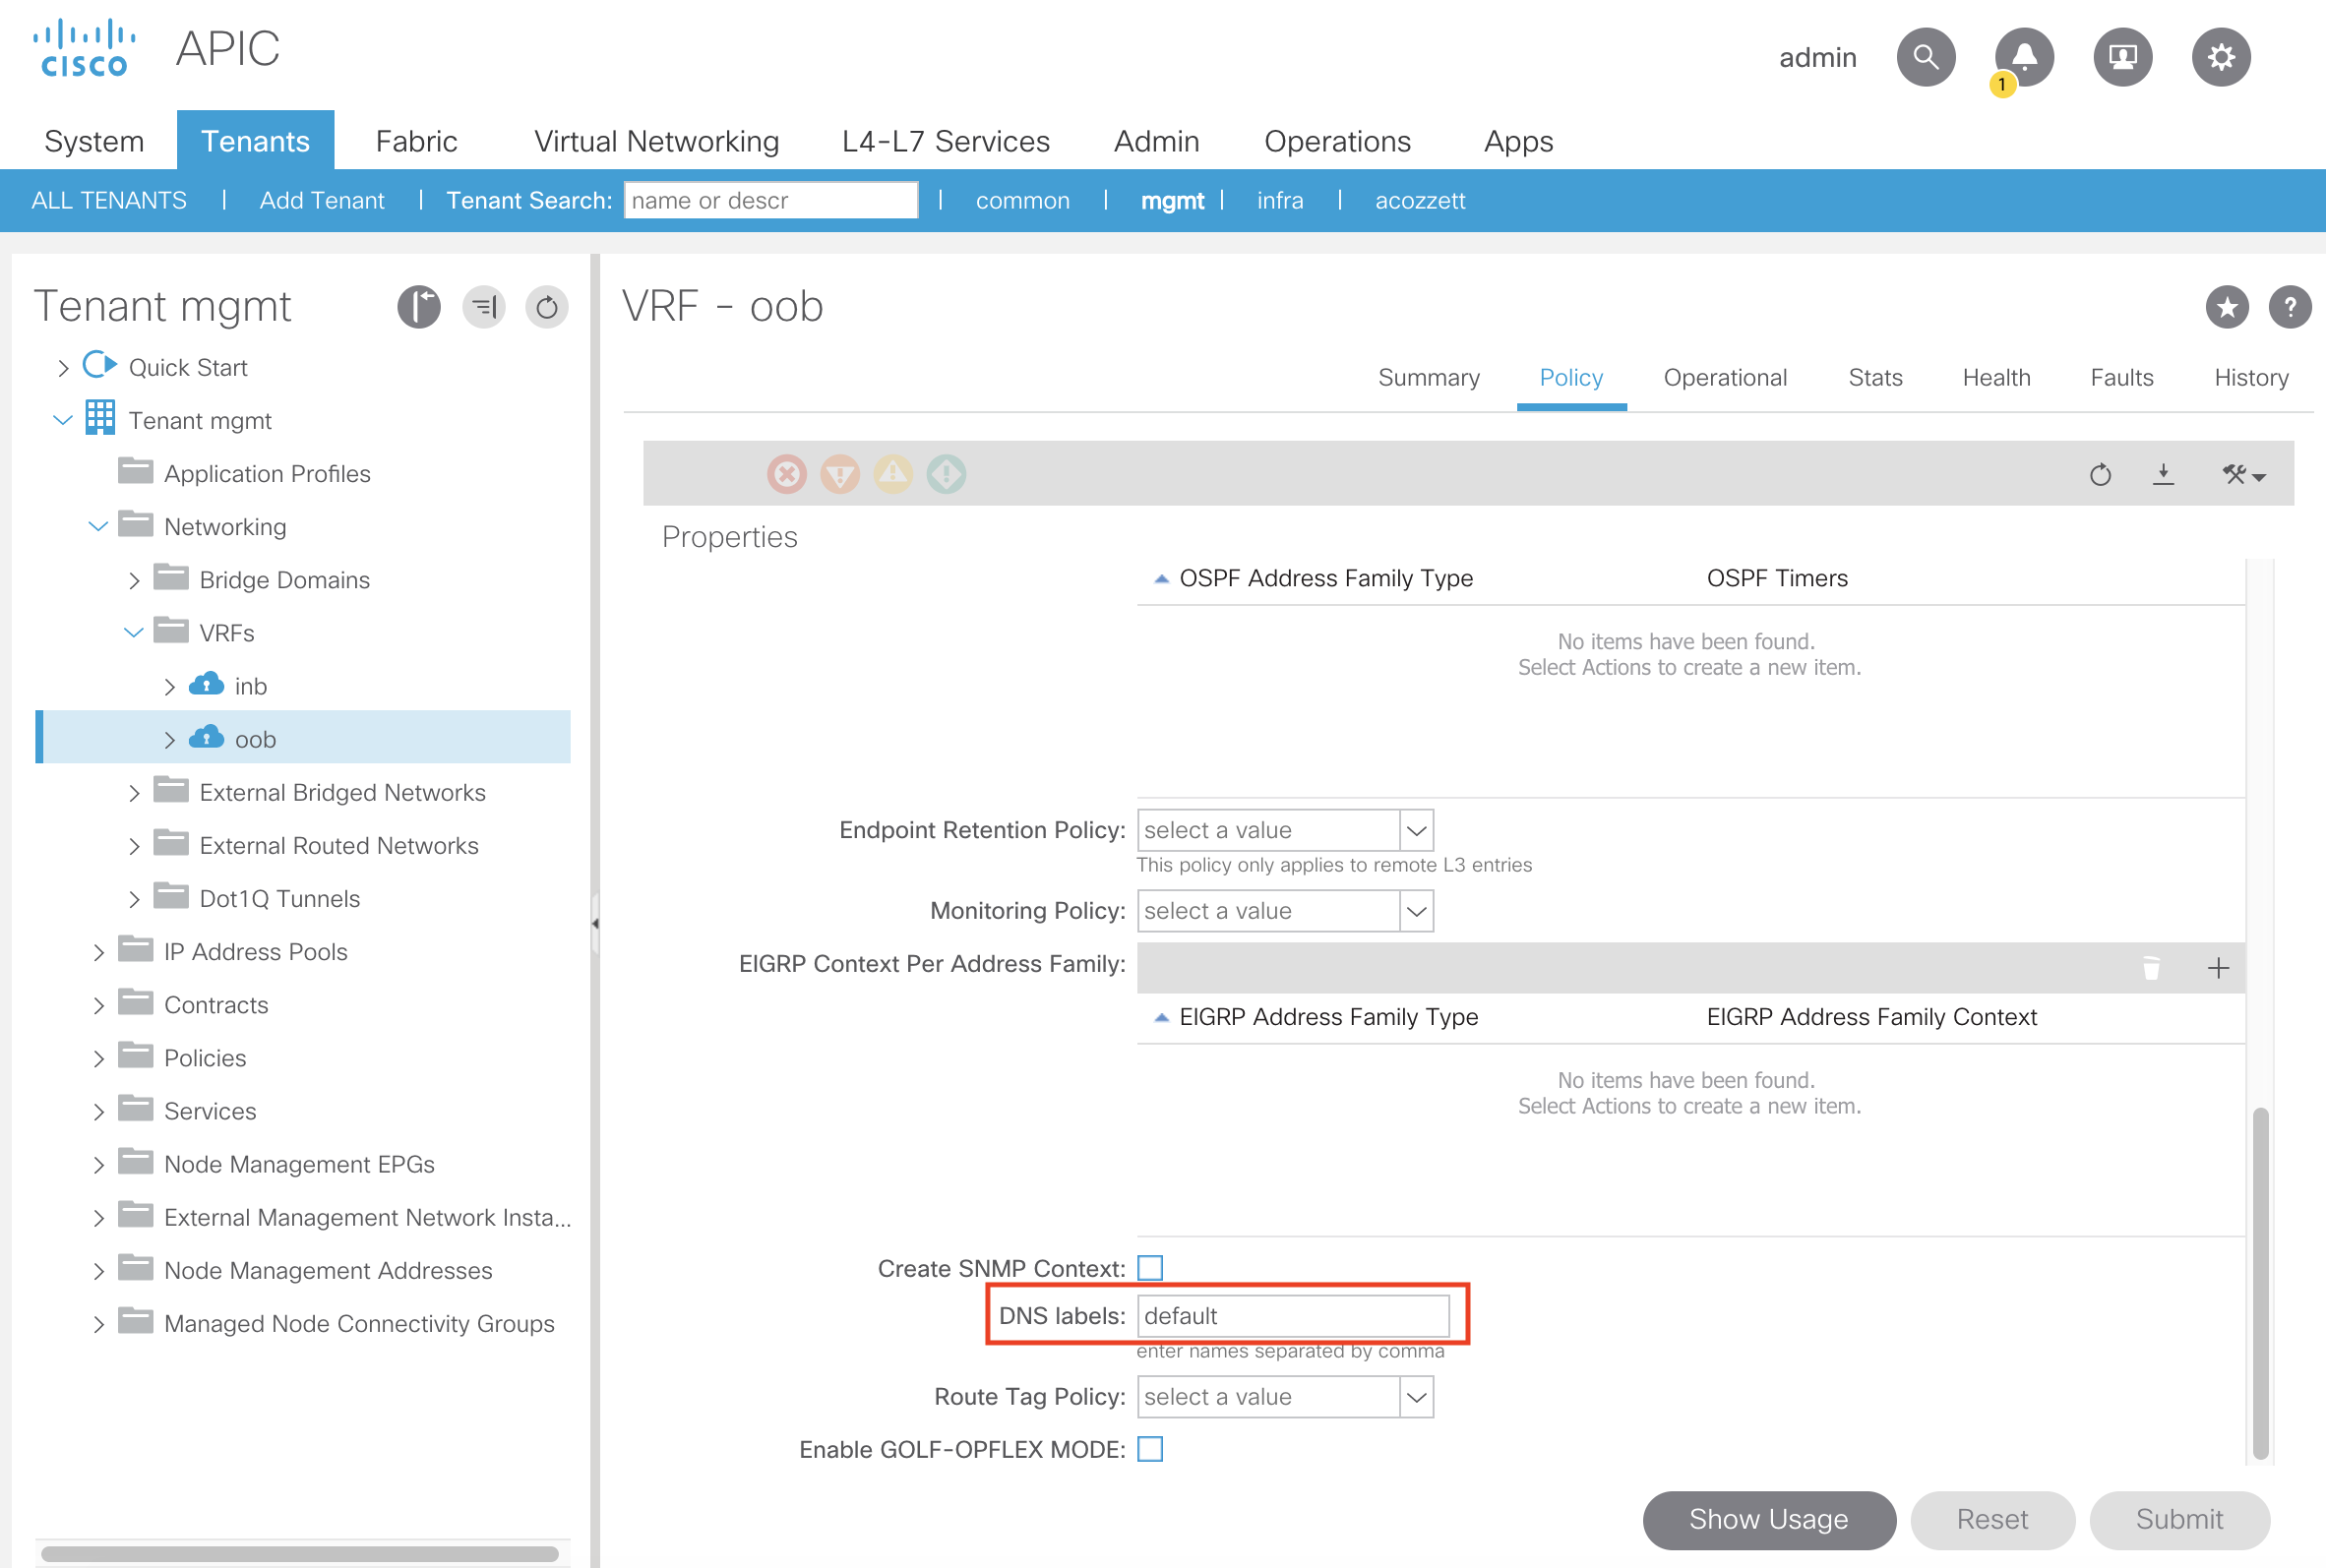
Click Submit to apply your changes
After applying our configuration we can verify from the leaf switch that our DNS Provider is programmed and our leaf switch can resolve DNS:
This concludes all the necessary ACI DNS configuration.
