In this tutorial we’ll be going over breakout interface configuration for ACI switches using the APIC GUI.
You can refer to the following public Cisco documentation for which highlights limitations of breakout interfaces:
Cisco APIC Layer 2 Networking Configuration Guide – Configuration of Dynamic Breakout Ports
Prerequisites:
* Fabric discovery completed
* Have a general understanding of ACI Access Policies
My Setup:
* Running ACI version 4.0(3d)
* Topology: Leaf-101 40G interface eth1/4 is the parent interface to be used for 4x10G breakout and eth1/4/1-4 connected to downstream server endpoints
Before we get started in the actual configuration, below is a high level overview of the Access Policy objects and object names we’ll be using:
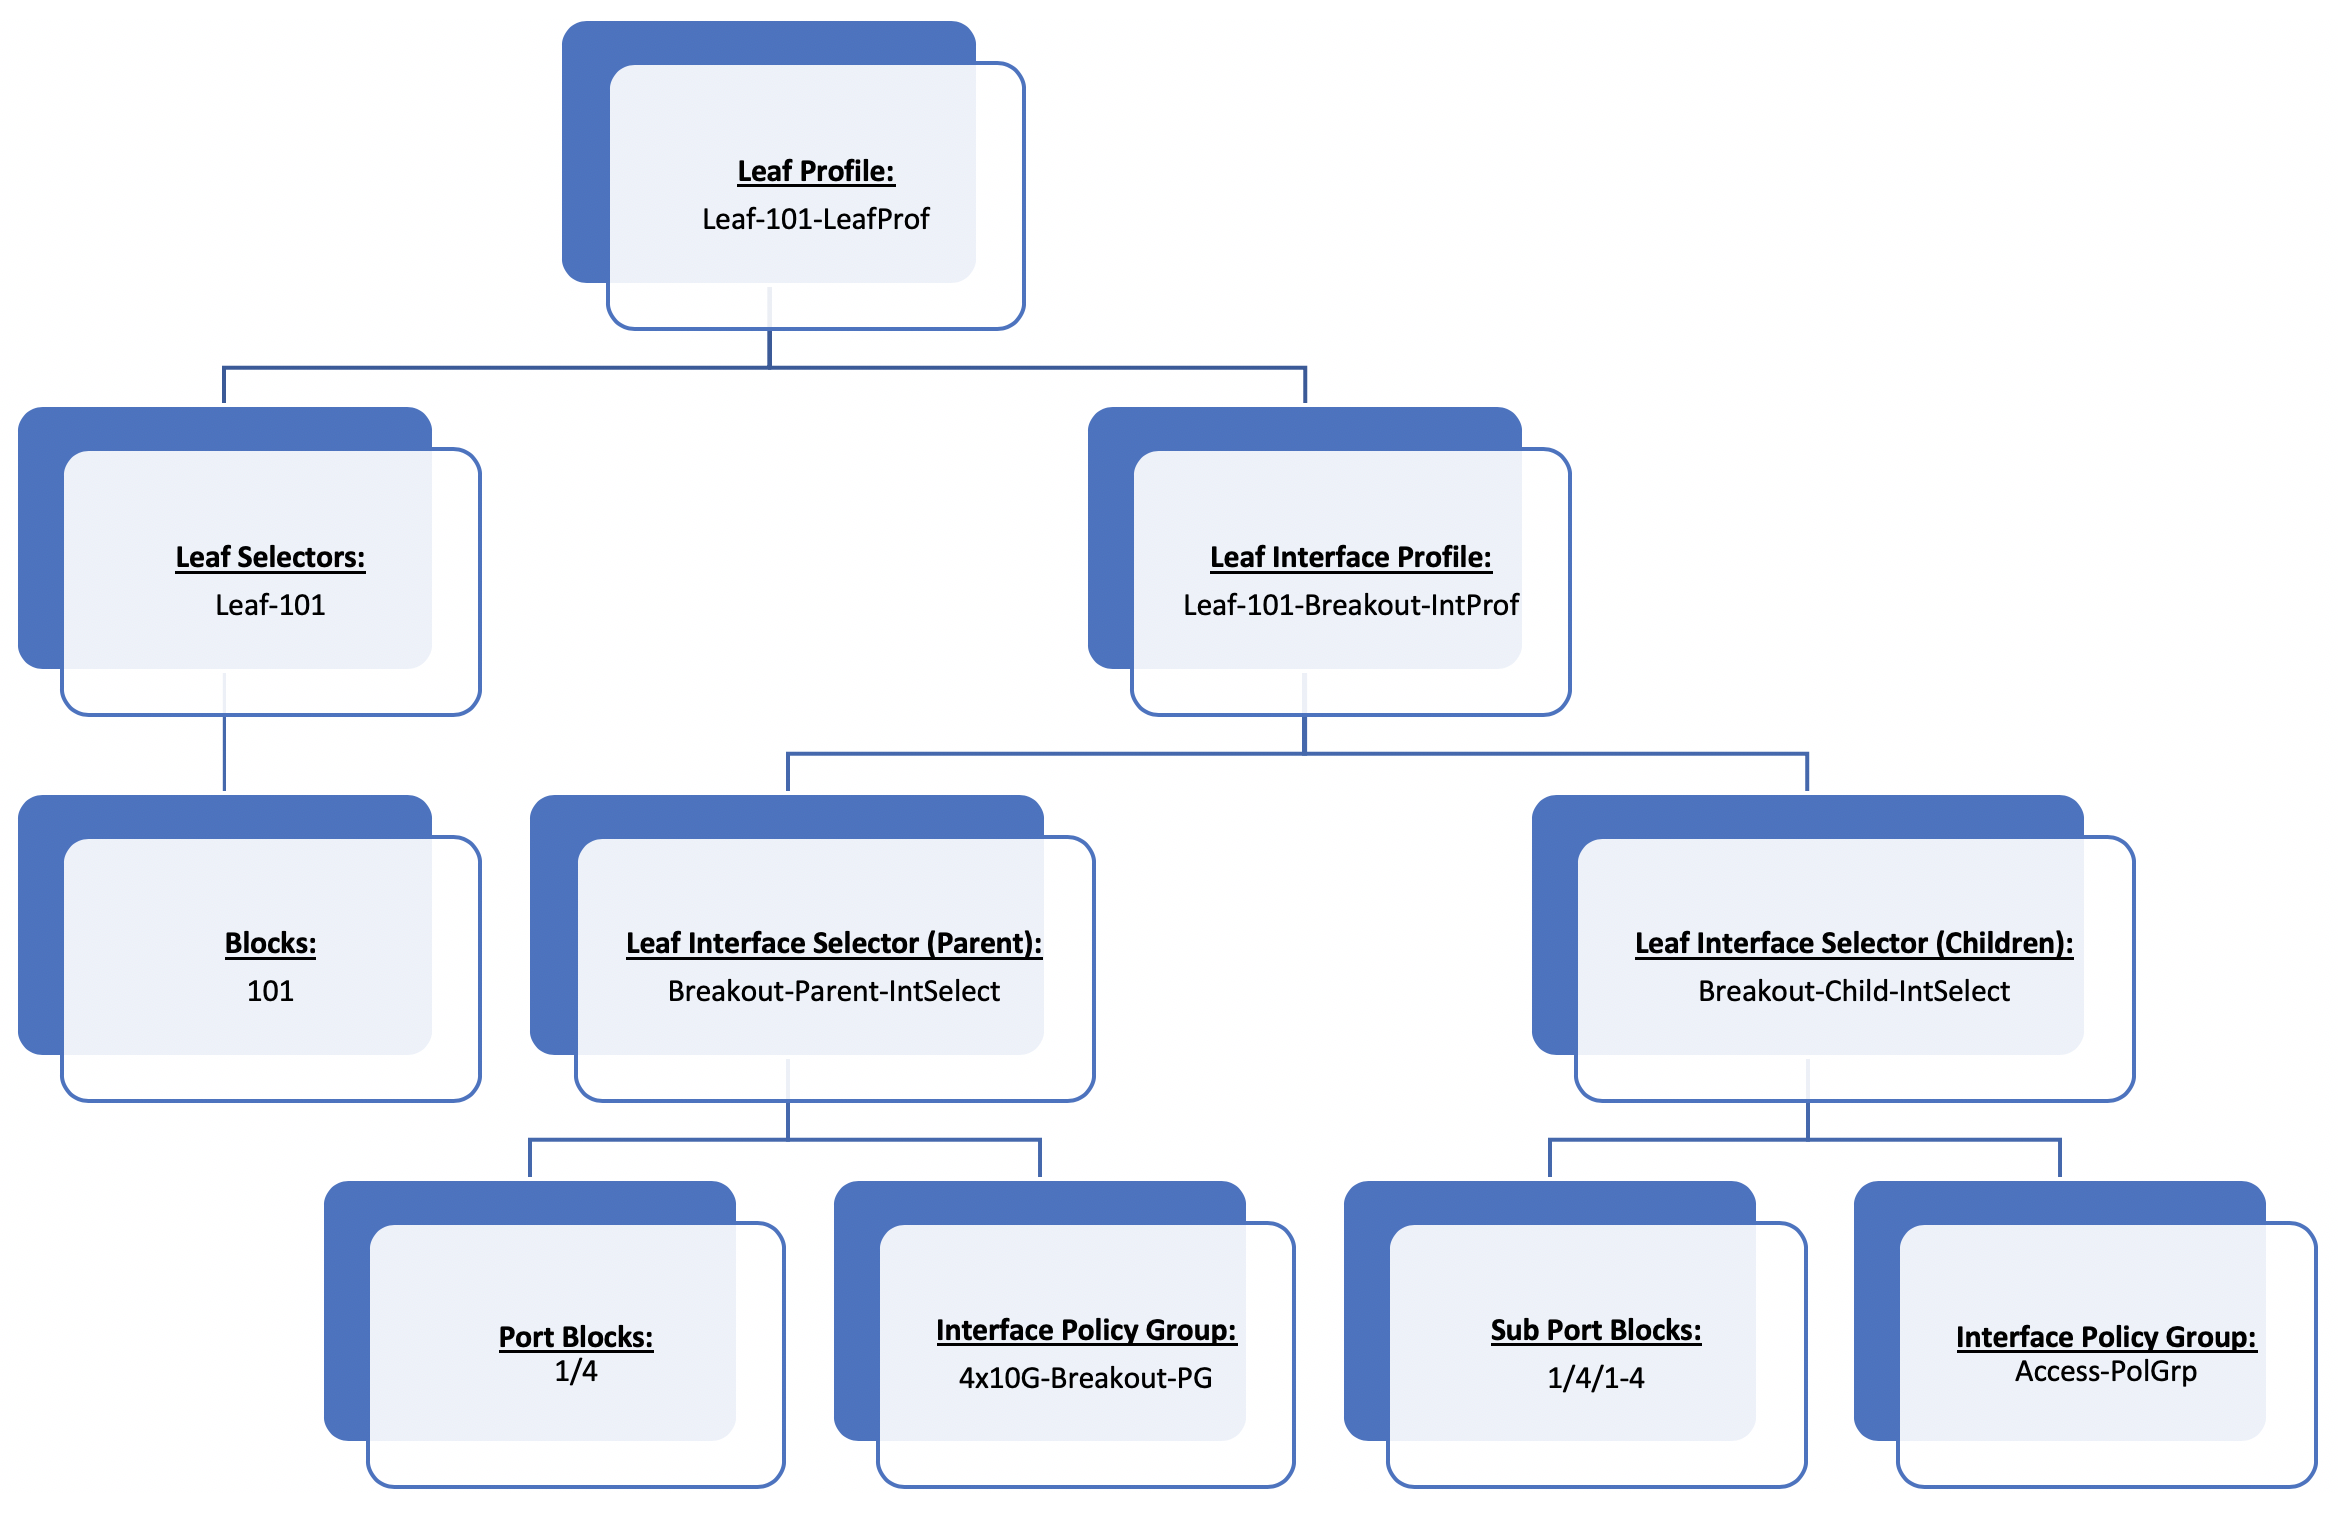
The first step in configuring a breakout interface on your leaf switch is to create a Leaf Profile. To configure a Leaf Profile navigate to the following APIC web GUI path:
Fabric -> Access Policies -> Switches -> Leaf Switches -> Profiles

Right click Profiles and select Create Leaf Profile
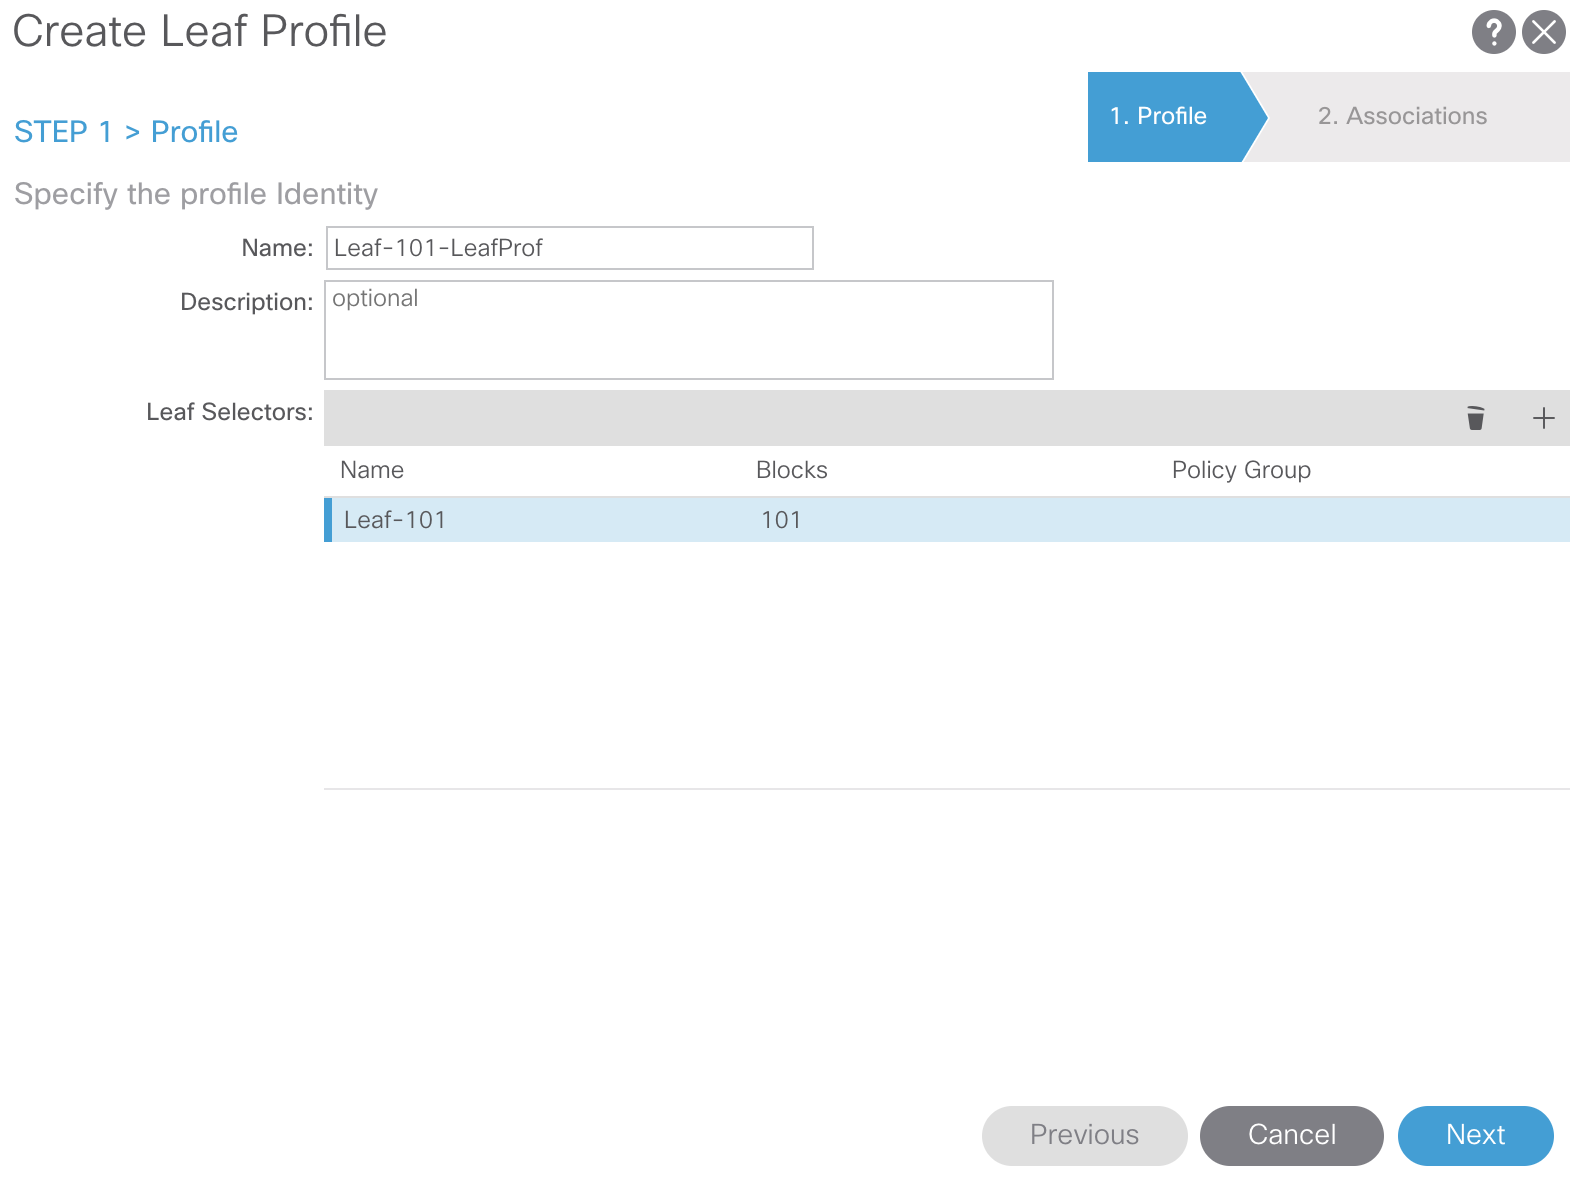
From here we’ll assign a name to our Leaf Profile as well as select the leaves we want to be associated to our Leaf Profile. For our purposes we’ll name our Leaf Profile Leaf-101-LeafProf since we’re only configuring breakout for an interface on Leaf-101:
Click Next and Finish to skip the interface Associations, we’ll come back to this later. Our next step is to create the Leaf Interface Profile.
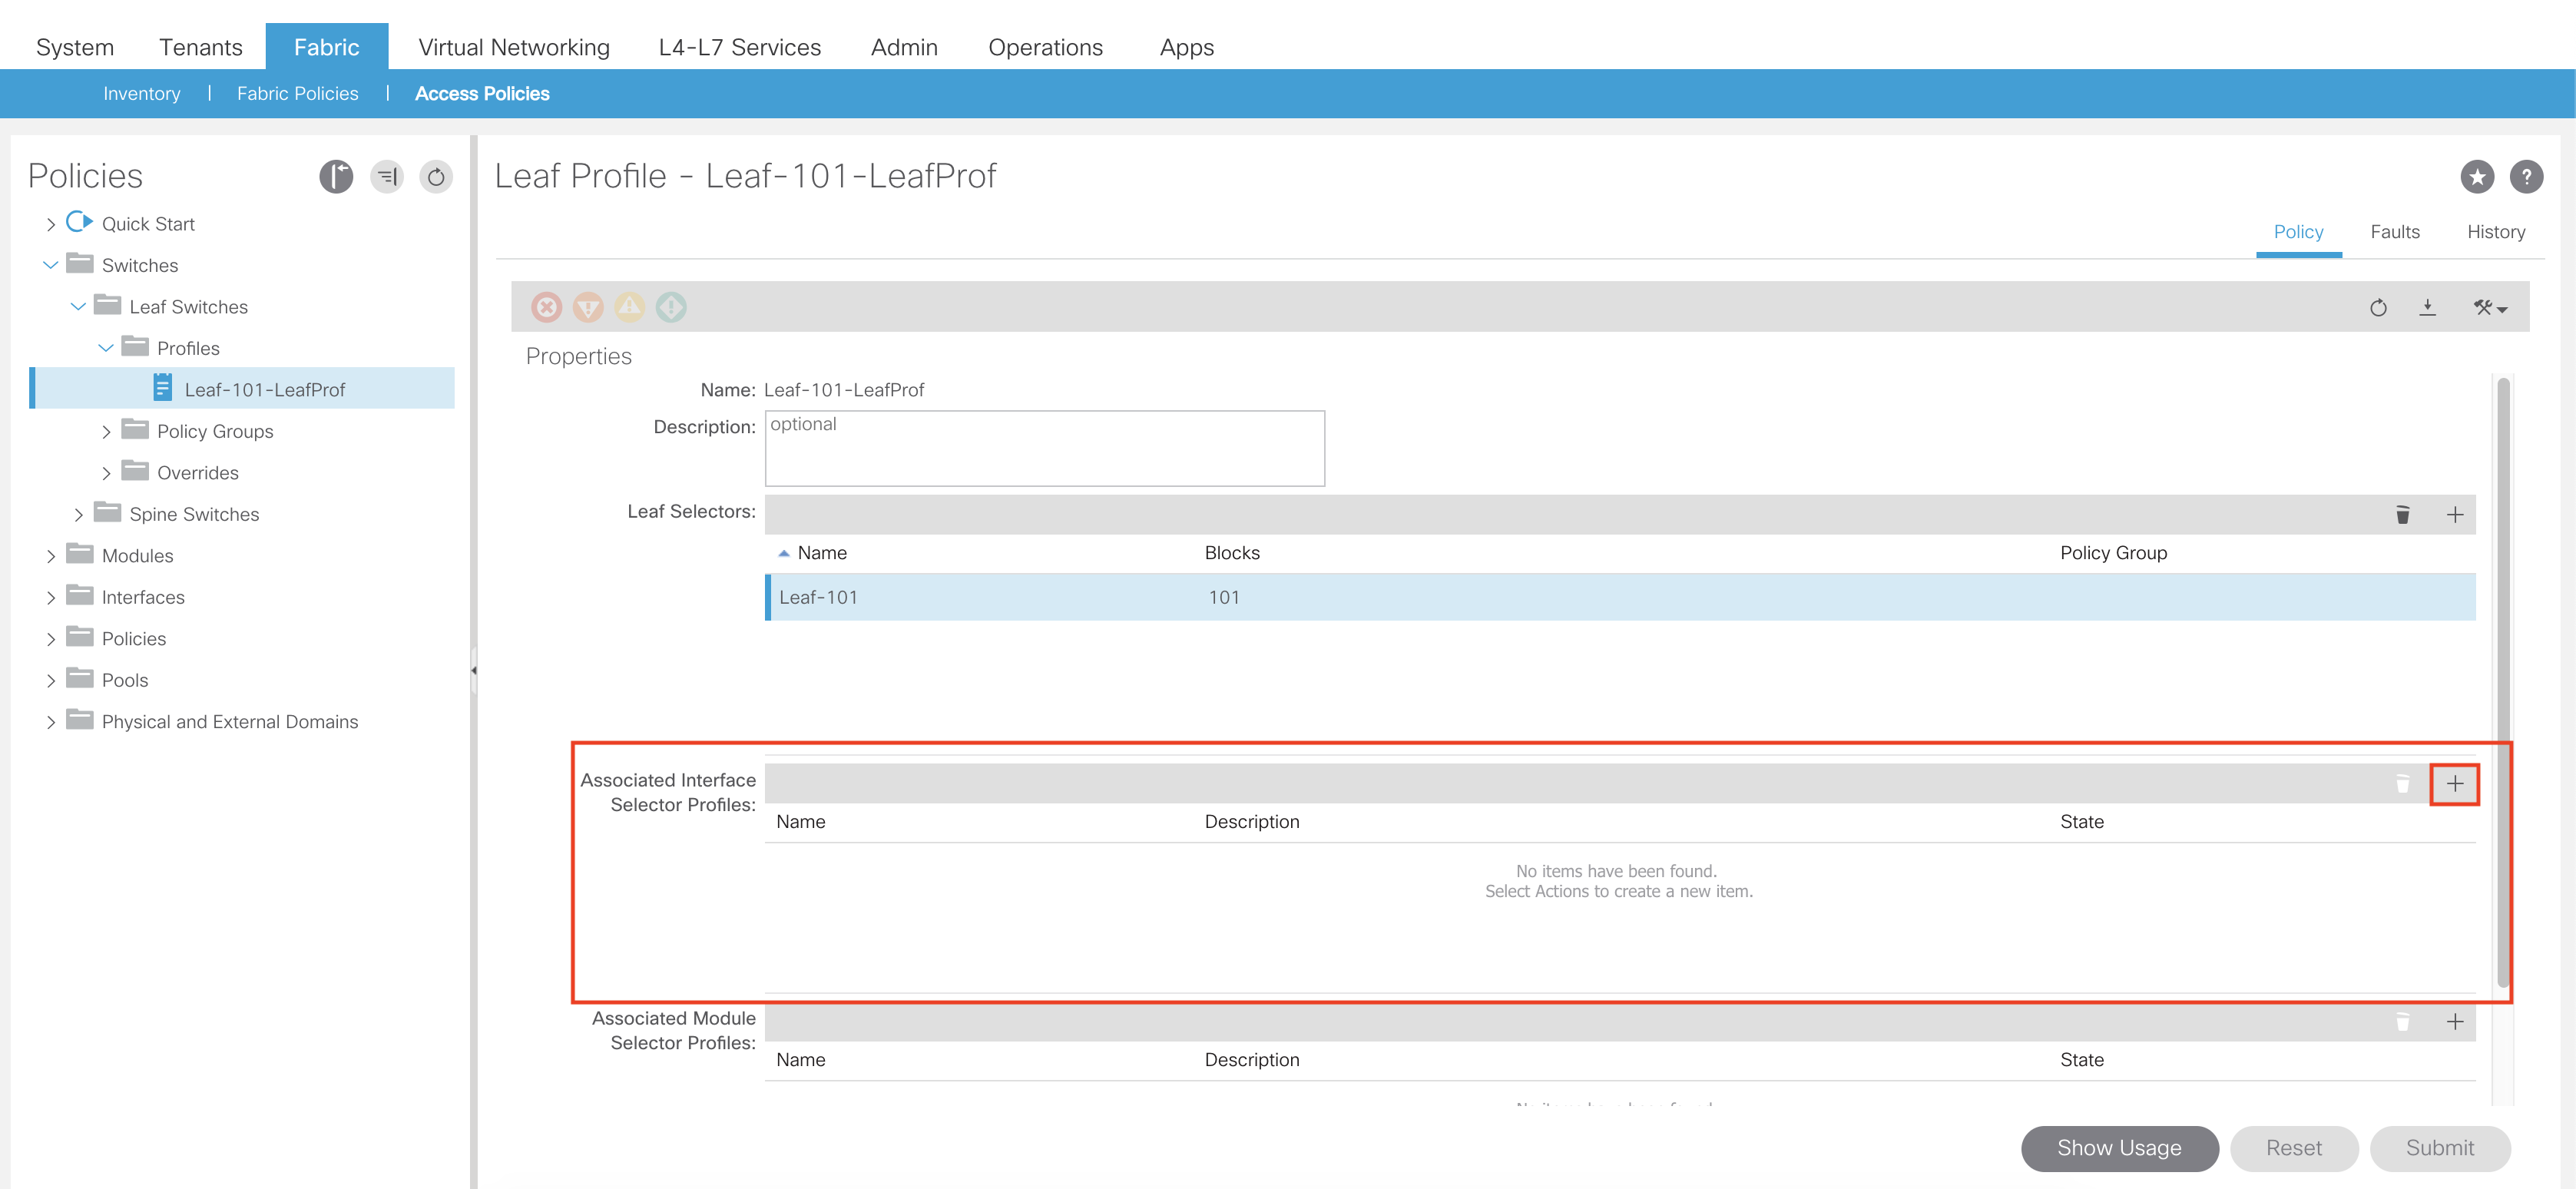
You can create the Leaf Interface Profile directly from the Leaf Profile page by clicking the + sign in the Associated Interface Selector Profiles region:
Or you can navigate to the following APIC web GUI path:
Fabric -> Access Policies -> Interfaces -> Leaf Interfaces -> Profiles

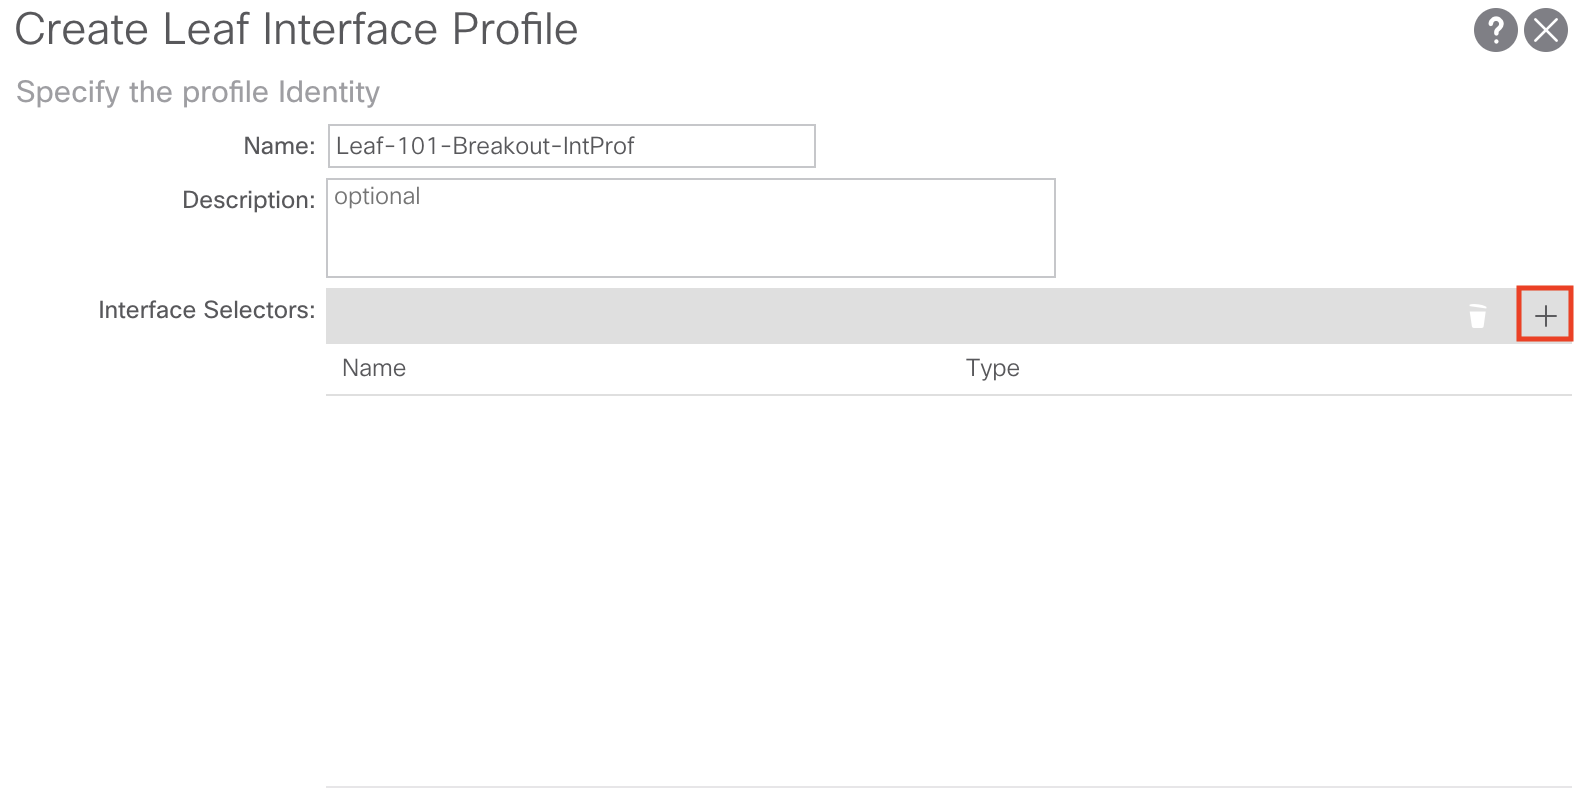
Right click Profiles and select Create Leaf Interface Profile
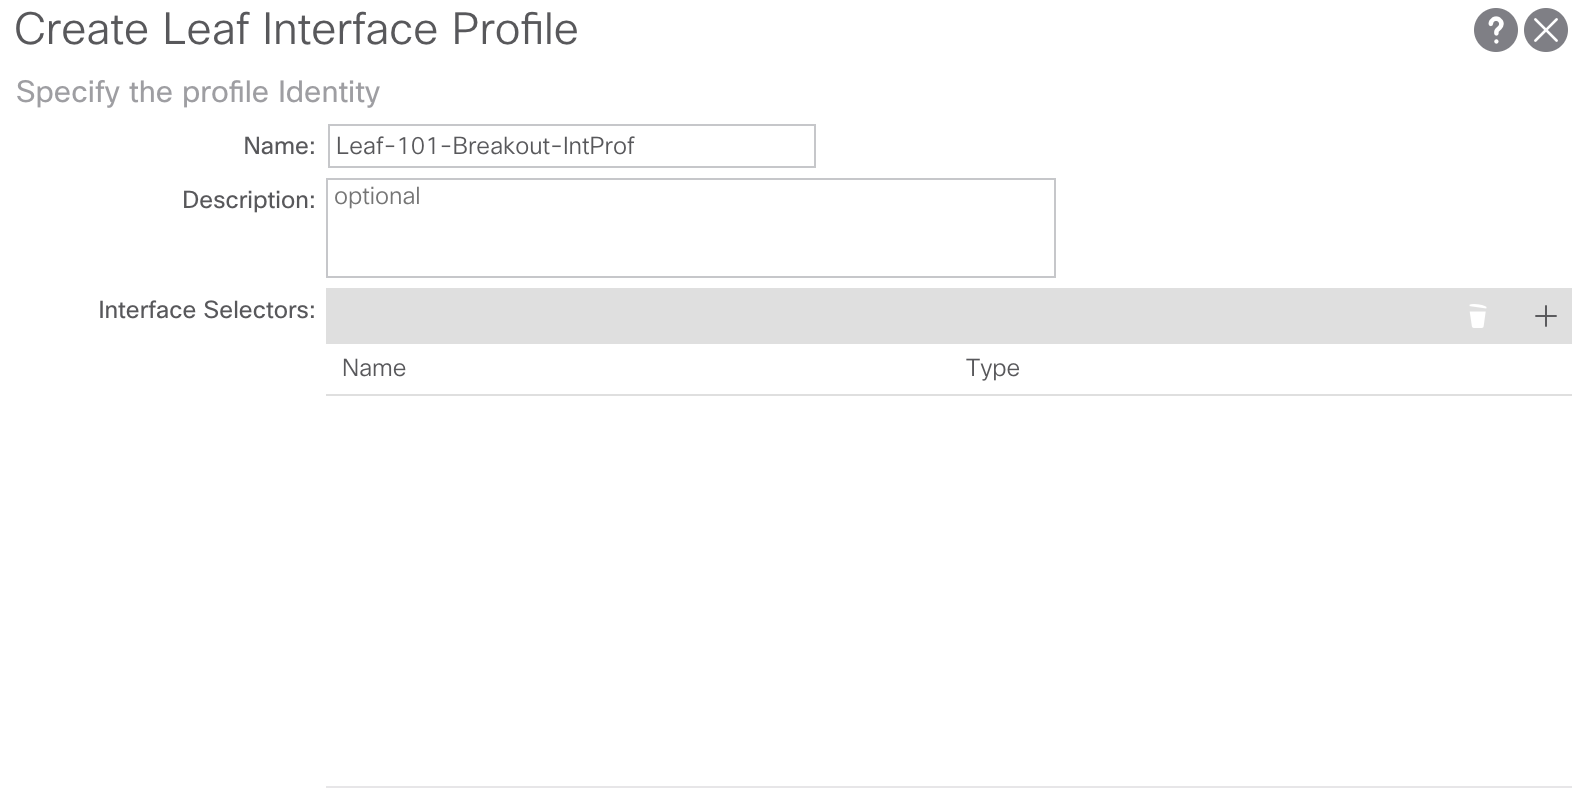
For our purposes we’re going to name our Leaf Interface Profile Leaf-101-Breakout-IntProf:
The next step is to create two Leaf Interface Selectors, one for our breakout parent interface (eth1/4), and the other for our breakout child interfaces (eth1/4/1, eth1/4/2, eth1/4/3, eth1/4/4)
We can create the Leaf Interface Selector directly from the Create Leaf Interface Profile window:
Or you can navigate to the following APIC web GUI path:
Fabric -> Access Policies -> Interfaces -> Leaf Interfaces -> Profiles -> YOUR_LEAF_PROFILE_HERE
Right click YOUR_LEAF_PROFILE_HERE and select Create Access Port Selector
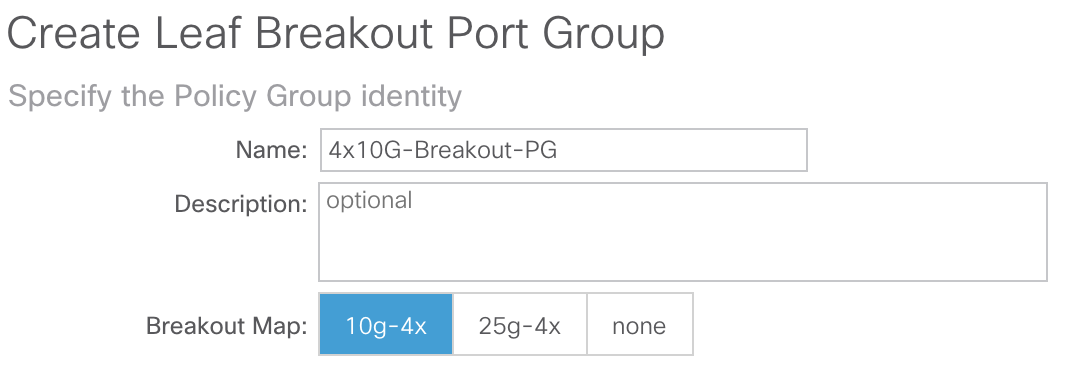
As mentioned earlier we’ll need to create two Leaf Interface Selectors, one for our breakout parent interface and the other for our breakout child interfaces. For our configuration of the breakout parent interface we’ll name our Leaf Interface Selector Breakout-Parent-IntSelect and use eth1/4 as our Interface ID. Additionally, we need to create/associate a Leaf Breakout Port Group as our Policy Group to signify that eth1/4 will be used as a breakout parent interface:

After a name, interface ID, and breakout policy group has been associated to our breakout parent interface, Submit the configuration.
Next we need to add an additional Leaf Interface Selector to our Leaf Interface Profile for our child breakout interfaces. Select the + button to add another Leaf Interface Profile:

Or you can navigate to the following APIC web GUI path:
Fabric -> Access Policies -> Interfaces -> Leaf Interfaces -> Profiles -> YOUR_LEAF_PROFILE_HERE
Right click YOUR_LEAF_PROFILE_HERE and select Create Access Port Selector
From here we assign a name to our breakout child Leaf Interface Selector, assign the breakout child interface IDs, and create/associate our Interface Policy Group for port-channel, virtual port-channel, or individual access port configuration down to our endpoint(s):

This concludes all the necessary configuration for breakout ports.
